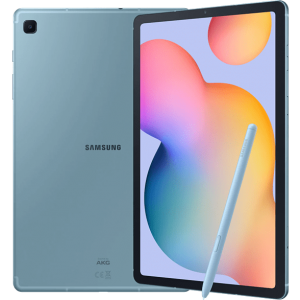
After a lot of internet searching about "de-googling", you've arrived at our website. One lingering question is "exactly how do I 'de-google' my smartphone?". The simple answer is... if you are comfortable connecting your phone to a host computer, typing commands into a terminal emulator, and doing some technical research, then the process of de-googling is within your reach.
But first a word of caution. There is always a minor risk of turning your device into a "brick". There have been more than a few occasions when a fatal error message flashed on the screen, or we put a device into a boot loop and thought, "Oh NO! I think I just ruined this phone!". But with patience and persevere most can be brought back to life. For the geek or engineer type, it's actually an exhilarating experience. But if you're the kind of person that just needs your tech gadgets to work so you can get on with life, then our recommendation is to purchase a de-googled mobile phone or tablet, and leave the dirty work to us.
This article is meant to familiarize you with the process, rather than a step-by-step guide. So if you've been thinking about de-googling your own device, let's get into the nuts and bolts.
Which Devices Can be De-googled?
iPhones cannot be de-googled, only certain Android devices. Which Android device depends on the manufacturer, model, and if it is unlocked. This can get tricky. There have been times when we attempted to de-google a Google Pixel, only to find out it was originally sold by Verizon. In that case, the bootloader cannot be unlocked. Or we received a OnePlus device and realized it was the wrong model number.
Carrier/SIM Unlocked: First, make sure your phone is carrier unlocked, also known as SIM unlocked. Any time you purchase a device from a telecom company like T-Mobile, AT&T, and Verizon it will be locked to their network until the device is paid for (if you're making monthly payments) or after a predetermined period of time has passed. You'll need to check with your carrier to verify this step. We recommend purchasing a factory unlocked device directly from the manufacturer or a trusted retailer.
Operating System Compatibility: To de-google a device, you are completely wiping the current operating system and installing a new one. Below is a list of de-googled operating systems. Check the links in this table to see if your phone is listed.
| Operating System | List of Compatible Devices |
| CalyxOS | |
| GrapheneOS | |
| LineageOS | |
| iodéOS | |
| /e/ OS |
Pixels from Verizon Will Not Work: Did you notice Calyx Institute's caution about Pixel devices from Verizon? No matter what operating system you want to install, the bootloader cannot be unlocked on a Google Pixel device from Verizon. Perform these steps to verify.
- Go to Settings app > About phone
- Scroll down and tap Build number 7 times
- A toast message will appear "You are now a developer"
- Tap back arrow to leave About phone, scroll down and tap System > Developer options
- Scroll down to OEM unlocking - If the OEM unlocking toggle is greyed out, it is likely a Verizon Edition and cannot be de-googled.
Understand the End Result of De-googling a Phone
Before proceeding, it's important to understand how de-googling will affect your phone or tablet.
All personal data on the device will be erased: You will erase all user data - your contacts, apps, personal files like photos, videos and audio files. Be sure to export this data off of the device now if you want to save it. We provide a tutorial on how to transfer data from an Android device.
The manufacturer's warranty may be voided: Most warranties are only a year, and if you have a newer phone this may be a factor. In the case of installing CalyxOS on a Pixel device, they state that Google's warranty will still be honored. In some cases, the original Android operating system may be re-flashed to the device, and the warranty may still be valid. Regardless, it's best to accept that your warranty is null and void.
You're migrating over to a new suite of apps: Say goodbye to the fancy camera app from Apple or Google, although the alternative camera apps work just fine. As a general rule, be prepared to let go of the luxury and conveniences from Big Tech (that's the trade off when you gain your freedom). The open source apps on de-googled phones are outstanding, but in a different way. They are reliable, and get the job done. Just keep this in mind... there is a difference between an app developed by a multi-billion dollar corporation with limitless funds, and an open-source app developed by a volunteer community or open-source enthusiast.
Preparation
Host Computer: You'll need a reliable PC or Laptop (called a "host") with a USB port, and a USB cable with type-C connector to tether to your Android phone. Whether it is running Windows, Linux, or Mac OSX, you'll use the terminal emulator and the command line to enter commands to the phone or tablet being de-googled. There are two software programs required, adb and fastboot, to communicate with your device from the host. Follow the guide linked below to install these programs.
Install adb and fastboot on host computer
Enable USB Debugging and OEM Unlocking on the Device: These two settings are located in Developer options. To access this menu, follow these instructions:
- Go to Settings app > About phone
- Scroll down and tap Build number 7 times
- A toast message will appear "You are now a developer"
- Tap back arrow to leave About phone, scroll down and tap System > Developer options
- Scroll down to OEM unlocking and enable
- Scroll further down to USB debugging and enable
Connect Device to Wi-Fi: An internet connection is always recommended during de-googling and Wi-Fi tends to be the most reliable method
Update the Device Operating System Software: Go to Settings app > System, and check that you have the most recent software updates for the device. Generally this is recommended, but in some cases a software downgrade is required.
Unlock the Bootloader
This step may be simple or complex depending on the manufacturer of your device. Pixel and OnePlus devices are consistently the easiest to unlock with only one command required. Samsung requires several steps that include button combinations and timing that feels more like solving a puzzle. Motorola devices require signing up for an account on their website and interacting with a web-based tool.
This step often gets a wrench thrown in the gears by the OEM when they introduce a "bug" (unintentionally?). For example, the Pixel 6a has a bug that allows bootloader unlock only when a specific Android 12 security patch is installed. If you update beyond the security patch into Android 13, then rollback protection becomes an issue. We've also seen the same thing happen with the OnePlus 7 Pro when upgraded to Oxygen OS 12. The only workaround is to find an official build and downgrade to Oxygen OS 11.
To provide a simple example, below are the steps to unlock the bootloader on a Pixel device. You'll need to follow the specific directions for your make and model. These steps also vary depending on the operating system you are installing. For example, CalyxOS issues these commands via a script.
Step 1: Connect device to host computer via USB and check connection
$ adb devices
* daemon not running; starting now at tcp:5037
* daemon started successfully
List of devices attached
92MAY02C72 unauthorized
Step 2: On host terminal, issue command (or VOL DOWN + PWR while device is powered off)
$ adb reboot bootloader
Step 3: Once the device is in fastboot mode, verify host is connected to device
$ fastboot devices
92MAY02C72 device
Step 4: Unlock the bootloader
$ fastboot flashing unlock
OKAY [  0.023s]
Finished. Total time: 0.023s
Step 5: Follow the on-screen prompts by pressing VOL buttons and PWR button to unlock the bootloader
Boot a Custom Recovery Using fastboot
In order to replace the existing operating system with a new one, there has to be a separate partition in memory to boot into and issue the commands to perform the installation. This is called the "Recovery" partition. These steps also vary depending on which operating system you are installing. CalyxOS and GrapheneOS installations do this step for you through their custom scripts. LineageOS and forks of LineageOS require this to be done manually.
Note: Ensure device is in Fastboot mode and connected to host before continuing
Step 1: Download the Recovery image if applicable
Step 2: Flash recovery image to the device with the command
$ fastboot flash boot recovery.img
Sending 'boot_a' (65536 KB) OKAY [  2.810s]
Writing 'boot_a' OKAY [  0.423s]
Finished. Total time: 3.503s
Step 3: Use the VOL buttons to navigate the menu and select Recovery mode and boot to recovery
Install the New Operating System from Recovery
Now that the device has booted into the Recovery environment, we can flash the new operating system to the device. Once again, this varies greatly depending on which OS you are installing. Whether it's performed automatically through a script, or manually, the new operating system comes in multiple image files designated for specific partitions on the device. There may be dozens of partitions to be flashed. The fastboot command is used to identify which image to flash to which partition. But in most cases, this is performed by a script. In our case with LineageOS, we give one command that flashes all image files contained in a .zip file.
Step 1: Download the LineageOS installation package
Step 2: Select Factory reset > Format data / factory reset > Format data
Wiping data...
Formatting /data...
Formatting /metadata...
Data wipe complete.
Note: This will remove encryption and delete all files stored in the internal storage, as well as format your cache partition.
Step 3: Return to main menu
Step 4: Sideload the LineageOS .zip package
- On device, select Apply update > Apply from ADB to begin sideload
- On host, sideload the package with command
$ adb sideload <filename>.zip
Total xfer: 1.00x
Device output:
Now send the package you want to apply
to the device with "adb sideload <filename>"...
Supported API: 3
Finding update package...
Update package verification took 55.7 s (result 0).
Installing update...
Step 1/2
Step 2/2
Install completed with status 0.
Step 5: Select back arrow in top left of screen and select Reboot system now
Note: The first boot usually takes no longer than 15 minutes, depending on the device. If it takes longer, you may have missed a step.
Conclusion
The most exciting and fulfilling part of the process is seeing the splash message of the new operating system on your screen. Congratulations if you made it all the way through! Again, if you're not comfortable with this process, then we're here to help. Whether you have a phone or tablet that you'd like us to de-google, or simply browse our selection of new and pre-owned devices. I hope this article has been informative and please contact us with any questions or comments.


