Overview
When migrating from an iPhone to a de-googled privacy phone, you'll probably want to transfer your contacts, photos, and other personal data. The most secure way to do this is manually by connecting both phones to a personal computer, or by copying data to a USB flash drive.
CAUTION: It may be tempting to install a third-party app that claims to do it with a few clicks. Avoid this at all costs because you'll likely have to sign-up, give personal information, pay for their "services", or worst of all, your data may be harvested to their servers. Instead transfer your personal data securely at no cost by doing it yourself.
Transferring Contacts
This process describes how to export your iPhone contacts to a vCard VCF format via your iCloud account.
NOTE: The VCF format of a vCard is similar to an online business card and is a standard address book file format.
STEP 1: Export contacts from iPhone to a computer using iCloud
- Tap Settings on your iPhone. Tap your name and then tap iCloud.
- Make sure Contacts is toggled to the On position. If this setting is turned off, contacts on the device won't sync with your iCloud account and cannot be exported to a file
- On a computer, open a web browser and go to iCloud.com/contacts, then sign into your Apple Account with your Apple ID
- To export all contacts, click the three horizontal dot icon in the sidebar and choose Select All Contacts
- Click the up-arrow icon on the right, then choose Export vCard
- The selected contacts are then saved to your computer as a .vcf file
STEP 2: Send the .vcf vCard file to your de-googled phone
METHOD A - Using email
Now that the .vcf vCard file is on your computer, one way to get it on your new de-googled phone is to attach the .vcf vCard file in an email.
Send the email to your own address, then open the email on your phone using an email app, and save it to the phone's Download folder.
- Open an email client on your computer
- Choose attachment and select the .vcf vCard file
- In the To: field of the email, put your email address
- Send the email
- On the de-googled phone, install and set up an email app like K-9 Mail, or ProtonMail (whichever is applicable).
- Open the email app on your phone
- Check for the email you just sent yourself and open it
- Now select the .vcf vCard file attachment, then download it to the phone's Download folder
Now, import .vcf vCard file into Contacts app
- On the de-googled phone, open Contacts app
- Tap the menu
- Select Settings > Import
- Select the .vcf file from the Download folder
Method B - Using a computer and USB cable
In this method, we transfer the vCard file using a USB cable connected between your new phone and your computer.
NOTE: If you are on a Windows PC, you may need to update drivers in order to transfer files from the PC to the phone. Follow the instructions in this guide.
- Connect new de-googled phone to computer using USB type-C cable
- On the phone, pull down notifications from the top of the display
- Tap Charging this device via USB notification
- Tap again where it says Tap for more options
- Settings > USB Preferences menu opens up. Select File Transfer
- The device should now be recognized by the computer
- From the PC's File Explorer or Mac's Finder, click the device's filesystem called Internal shared storage.
- Copy the contacts .vcf file from your computer into the phone's Download folder
Now, import .vcf vCard file into Contacts app
- On the de-googled phone, open Contacts app
- Tap the menu
- Select Settings > Import
- Select the .vcf file from the Download folder
Method C - Using a USB flash drive
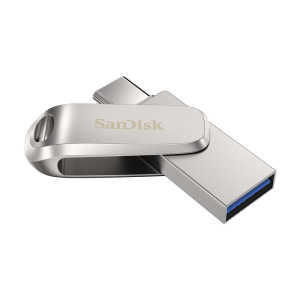
TIP: A USB flash drive is a reliable and easy method to migrate data. We recommend this USB flash drive as an accessory when purchasing your new de-googled device.
- Connect the USB flash drive to your computer, then copy the .vcf vCard file to the USB drive
- Eject the USB flash drive and remove it from the computer
- Power on the new de-googled phone and insert the USB flash drive that contains your files into the charging port
- Open Contacts app
- Tap the menu
- Select Settings > Import
- The Files app opens; tap the menu in the top left
- Tap USB drive and scroll until you see the .vcf vCard file
- Tap the .vcf vCard filename; your contacts will be imported to the Contacts app
- To eject the USB flash drive, pull down notifications from the top of the display and tap Eject under the USB drive notification
- Pull the USB flash drive out of the device's charging port
CONGRATULATIONS! Your contacts are now imported into your new phone's Contacts app
Transferring Photos
OPTION 1 - Transfer photos from iPhone directly to new phone using iCloud
- Make sure iCloud Photos is synced on your iPhone by going to Settings > Photos > iCloud Photos and toggle the option on
- Once your photos are synced, it’s time to move to your new phone
- Open Chromium or DuckDuckGo browser app on your new phone
- Go to iCloud.com and log in with your Apple ID
- Go to the Photos section to view your synced photos
- Tap Select, then Select All (or pick the photos you want to download to the new phone)
- Select the 3-dot menu button on the bottom-right corner in iCloud
- Tap Download and let the files download to your new phone (the images will save to the Download folder on your new phone)
OPTION 2 - Transfer your iPhone photos using a personal computer
This process involves connecting your iPhone to a computer using a USB cable, followed by connecting the new phone to the same computer and copying the photos over. The steps below are for a Windows computer, but will be similar if you are using Linux or Mac.
Step 1, Transfer iPhone photos to PC:
- Connect the iPhone to your PC with a USB cable
- Turn the phone on and unlock it
- If asked, to trust the computer in use, select Trust
- On your PC, click on the Start Windows button
- Open the Photos app
- Select Import, then select From a connected device
- Follow the instructions and choose which photos and where you want to import
Step 2, Import photos to new phone:
- Connect new privacy phone to computer using USB type-C cable
- On the phone, pull down notifications from the top of the display
- Tap Charging this device via USB notification
- Tap again where it says Tap for more options
- Settings > USB Preferences menu opens up. Select File Transfer
- The device should now be recognized by the computer.
- On your computer, go to the folder where you saved the photos; Select the photos, right-click and select Copy
- Go to This PC, find the icon representing your phone and click the device's filesystem called Internal shared storage
- Open the folders DCIM > Camera
- Right-click and select Paste
Transferring Bookmarks
There are various ways to export bookmarks from your iPhone and import to your new phone. The easiest method is to sync bookmarks between your iPhone and iCloud, similar to the process above for contacts.
- Export bookmarks from iCloud into a .html file onto your PC
- Connect the new phone to the PC using USB cable
- Enable file transfer, and copy the .html file to the Download folder on the phone
- Open the web browser app of your choice; we'll use DuckDuckGo browser as an example
- Tap the three-dot menu in the top right and select Bookmarks
- Tap the three-dot menu in the Bookmark settings and select Import
- Navigate to the Downloads folder and select the .html file you uploaded; your bookmarks are now imported to your new phone
Transferring Calendars and Tasks
If you only have a few entries in your iPhone calendar or tasks, it's best to manually recreate them in the new phone's calendar. However, if you depend on the iPhone calendar and have extensive entries, there is no easy way to sync calendar events from iPhone to Android. There are many guides online that tell you to sync using Google Calendar. But since privacy phones do not contain any Google apps, that method isn't an option. Alternatively, if you are technically inclined, DAVx5 is an open-source app that syncs using CalDAV/CardDAV service to your choice of cloud storage (we recommend Nextcloud or OwnCloud).
App-specific Data
Some personal data on your iPhone is likely app-specific. Therefore, you'll need to refer to the app's documentation or help files to figure out how to migrate data.
Need Assistance?
If you purchased a privacy phone from us and still need help migrating your personal data, contact us for assistance and we'll be glad to help.

